
Lighting in games
Lighting in video games is a wide, involved and a complicated concept. There have been many ways to approach it over the years, always closely tied to the capabilities of the current hardware. In the age of deferred rendering, geometry shaders and PBR, lighting in 2D games seems almost trivial. There are only two dimensions and the amount of polygons on screen is often smaller than of a single model in a 3D game.
Unless one tries to push the envelope of rendering methods or goes for a very unusual aesthetic lighting in 2D and 3D video games is a solved problem.
Isometric games are different story.
The problem with a typical isometric game is that although the game is 2D the world it’s trying to represent is 3D. There is a fundamental disconnect between how the light is to behave and what is actually being lit on the screen. After all sprites look as if they have depth but they don’t.
There are multiple way to solve this problem.
Make the game 3D
One of the simplest solutions to the problem is to just make the game 3D. This way all existing methods and workflows used for 3D games will apply. This however will remove all benefits of making the game 2D (like not worrying about polygon count).
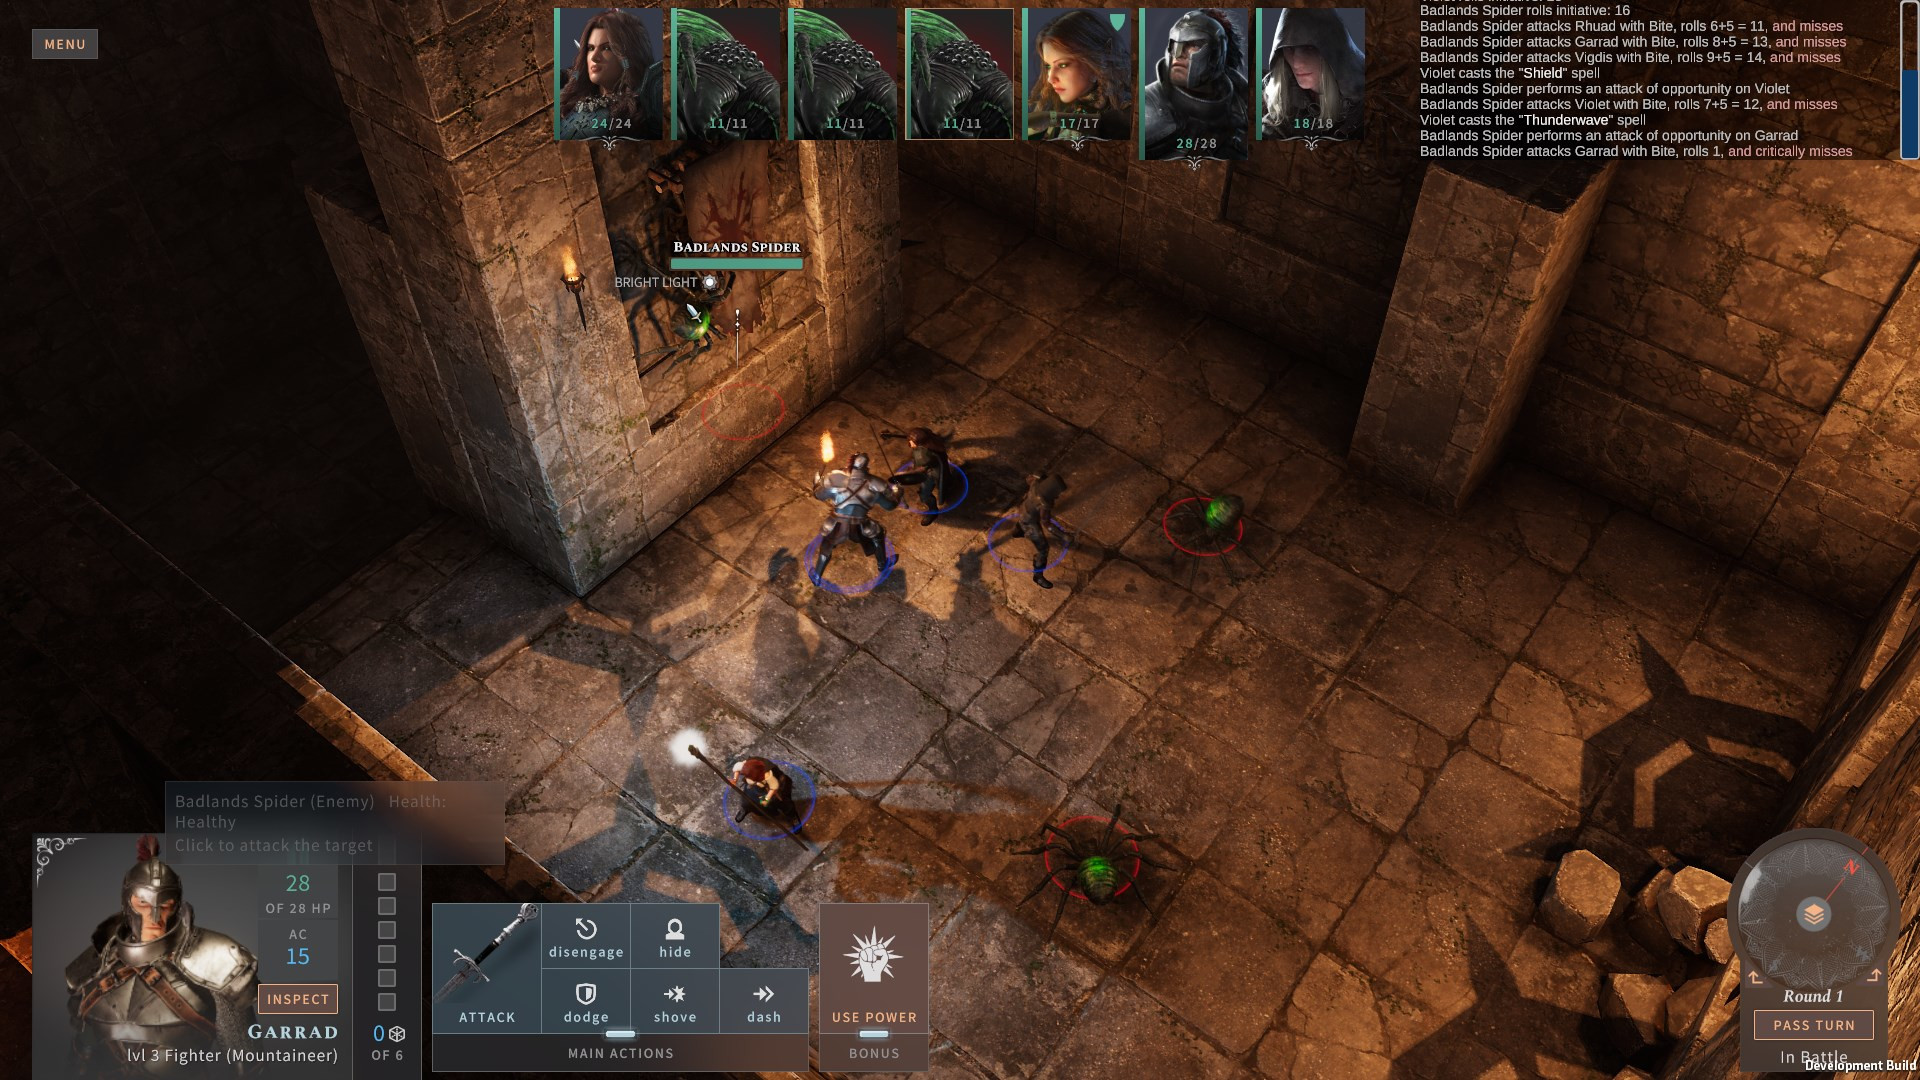
Screenshot from Solasta: Crown of the Magister.
Make the game 2D
Another simple solution is to make the game simply 2D. In this case it will mean switching from an Isometric perspective to a top-down perspective. Then the disconnect between the world and the shape of the sprites disappears making all existing methods for 2D available. However switching of perspectives removes also the feeling of depth, which might be an unacceptable artistic compromise.
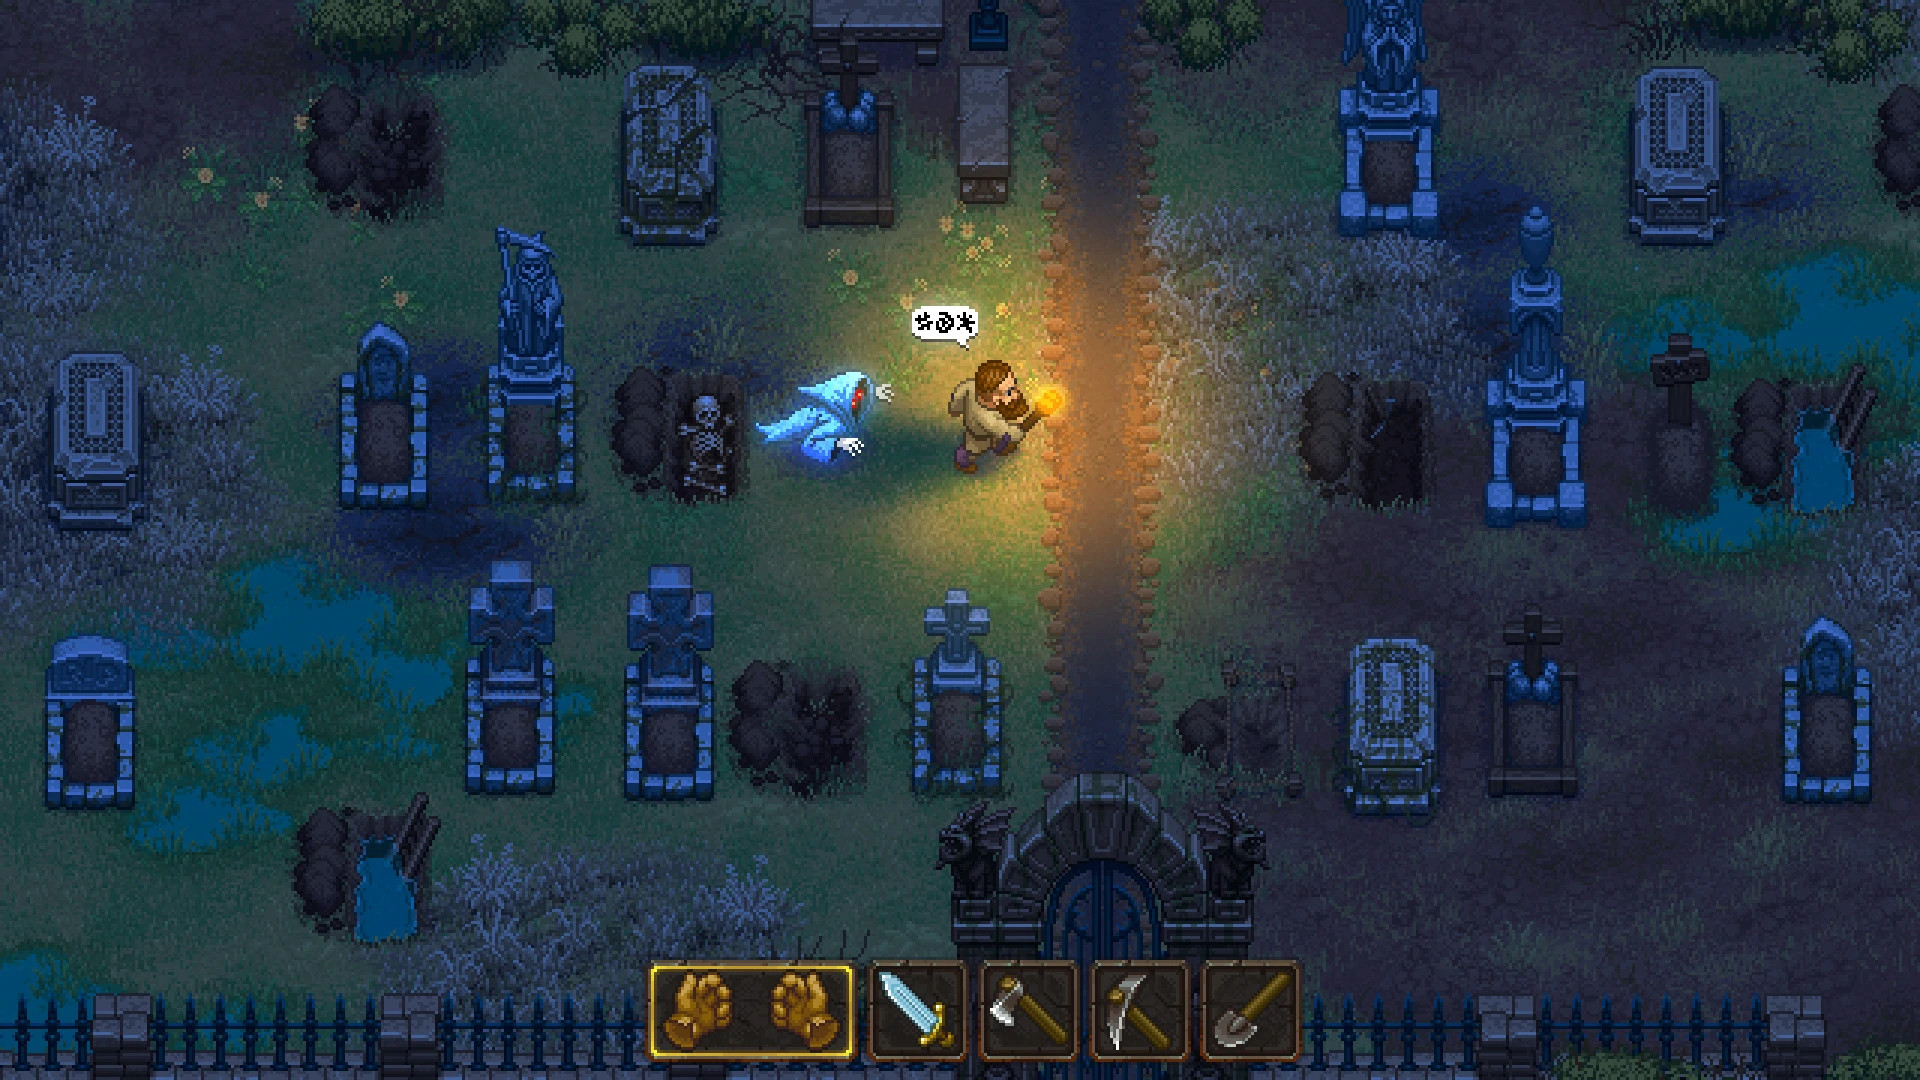
Screenshot from Graveyard Keeper.
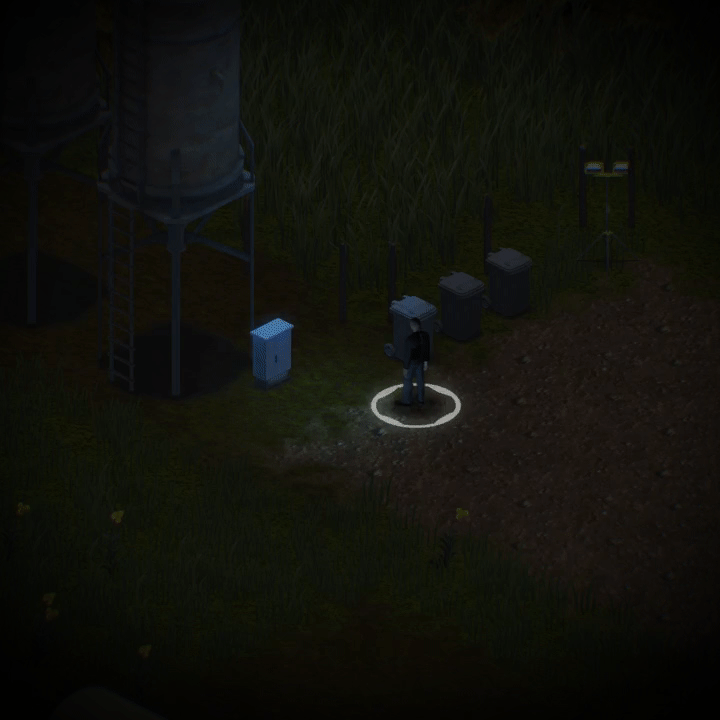
Use tile lighting
This method is very popular in roguelikes regardless of perspective. The basic principle is to subdivide the world into tiles and simulate spreading of lights only for those tiles. Objects standing on tiles are lit the same way as the tiles.
This method has a lot of benefits. Most importantly it’s not computationally expensive and does a good job of determining occlusion. However it has one significant downside – it’s very visible. The differences in light colour and strength between tiles and objects can be jarring.
Screenshot from UnderRail.
Use diffused spherical overlays
This method uses point lights which are only used to show as circles or ellipses on the screen that colourise anything that’s behind them. This method has the benefit of being simple and giving nice smooth lighting. However it cannot do proper occlusion, might not look great for big contrasts and for it to fit well with the environment there might some additional manual work required.
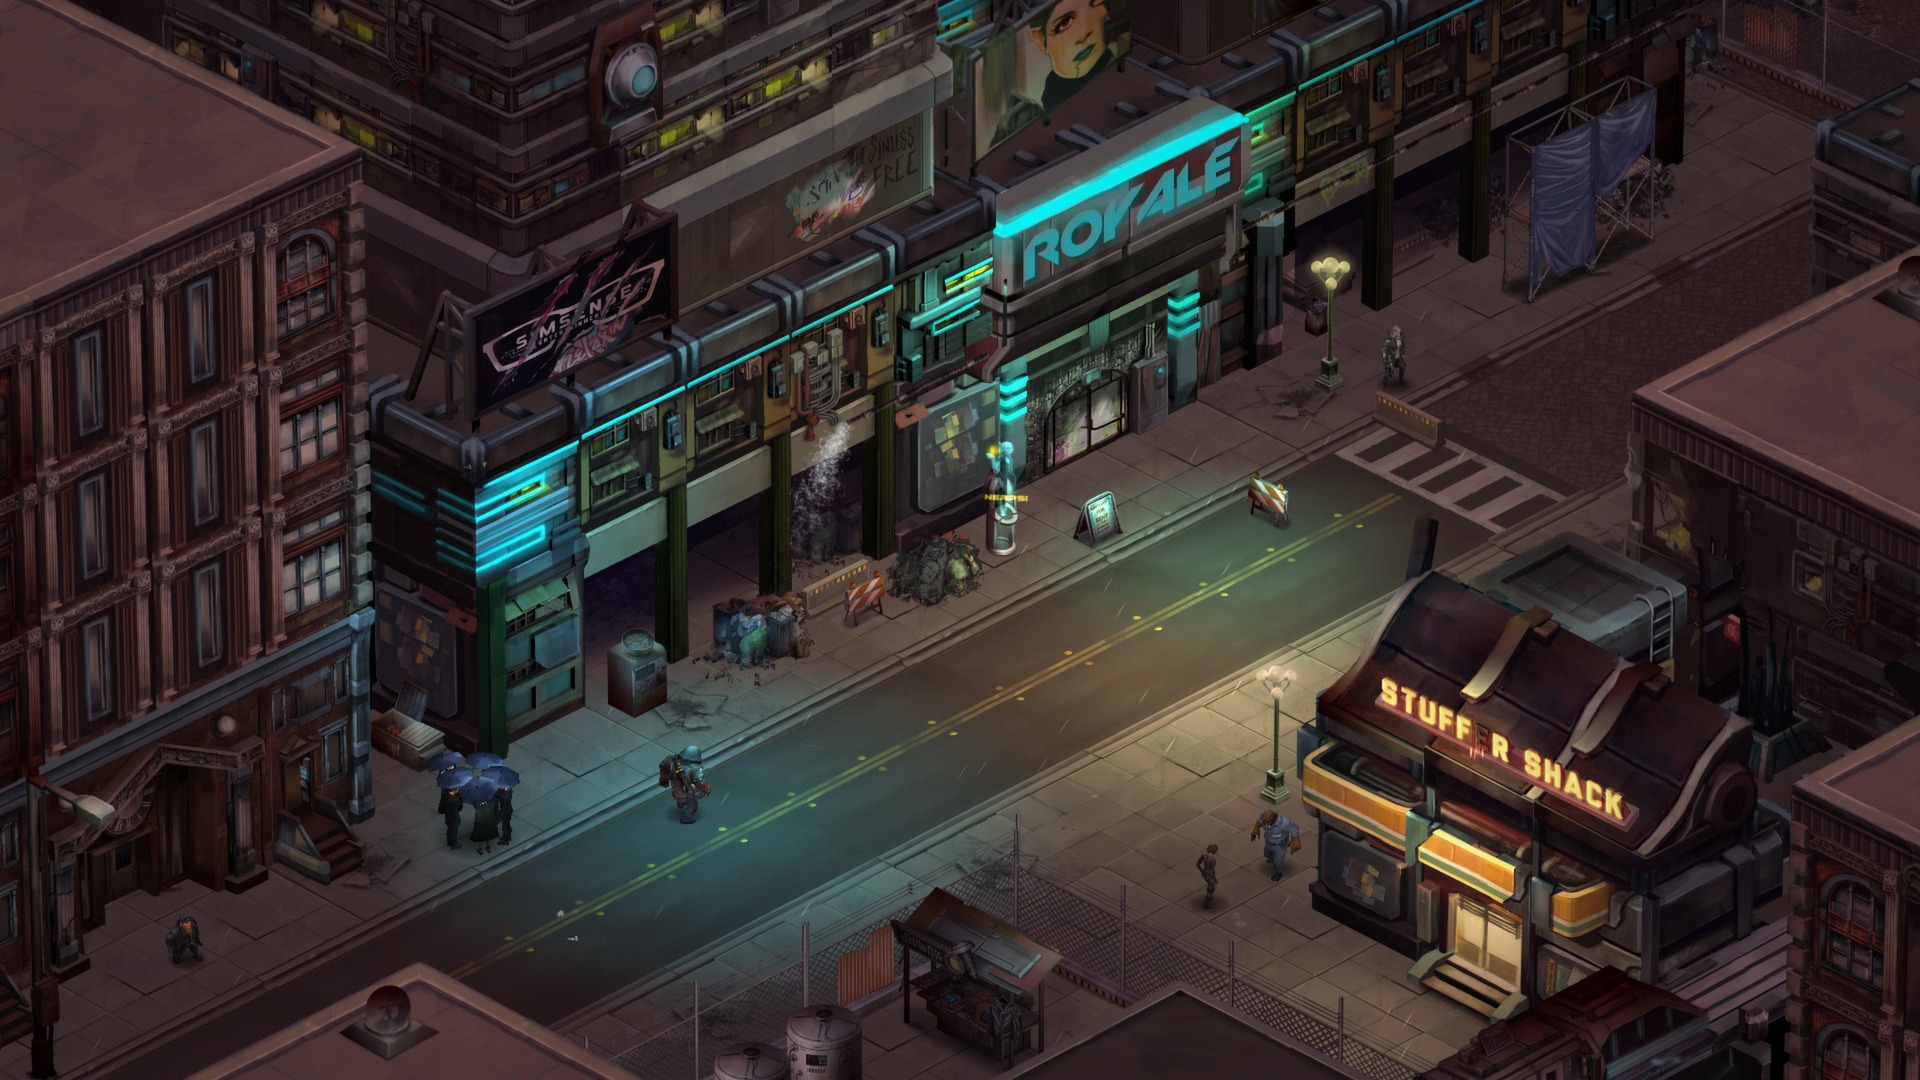
Screenshot from Shadowrun Returns.
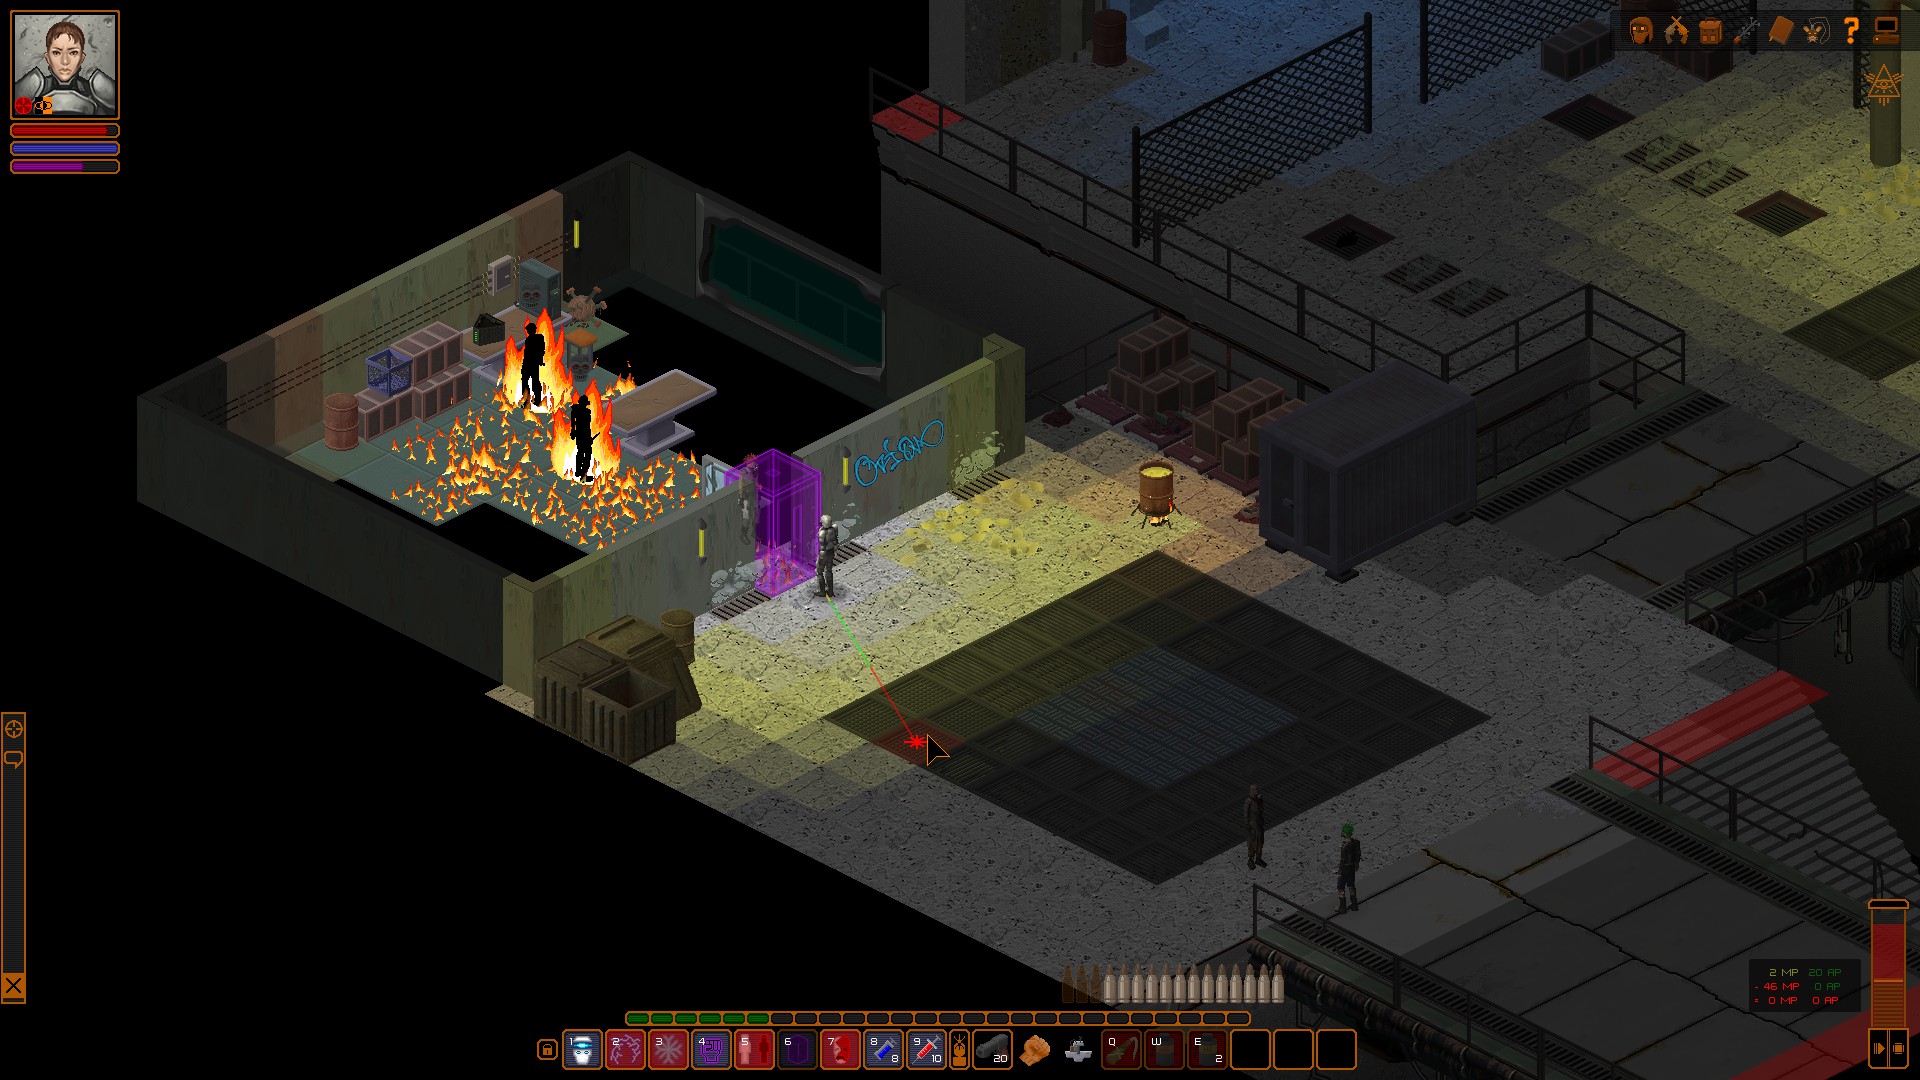
Normal map everything
This method most probably gives the most realistic results. The idea is to have all sprites normal maps and all lighting in the world be compromised of point or directional lights. By using regular normal map lighting logic the world can be very realistically lit. The few problems with this method is that it can get quite expensive computationally, might require subdivision of sprites into smaller elements and is unable to do occlusion on its own.
Screenshot from Brigador.
Lighting in Elemental Enigma
Elemental Enigma uses yet a different lighting method that is a combination of tile lighting with subdividing of sprites. More details will be in a dedicated post in the future.